Pan Fried Black Pepper Chicken Chop!

Last weekend was a blast, cooking cooking and cooking! Haha!

Tried to cheer Mr Pau up from the tired week, by rushing home from work on Sat to cook dinner.

I was googling for recipes on the Internet, when I came to My Wok Life’s Fusion Chicken Chop and Sauteed Potatoes.

Mine chicken chop, modified slightly from My Wok Life’s recipes : )


Pan Fried Chicken Chop with Potatoes and Baked Beans

I asked Mr Pau if he took any pictures, he somehow just took a picture of my kitchen. Hahaha, also duno for what ;p

Yes, the kitchen counter usually is in a mess when I cook. I am an organised person in a disorganised manner, wahahaha!!

And you see the little white bowl, it’s our dessert – Almond Longan Jelly!

We were so happy that the dinner turned out nice! And as you know, I’m a “cook cheat” person. LOL.

I got the Lawry’s steak seasoning from NTUC, and it made the chicken chop really tasty! (Use by moderation I guess, probably not so healthy, hee)

(A) Chicken Chop
– Chicken Breast or Chicken Thigh, deboned
– Ground Black Pepper
– Steak Seasoning
– Soy Sauce

I used the seasoning by agar-ration, so I wouldn’t be able to tell the measurements.

Coat the meat with soy sauce, steak seasoning and black pepper. “Rub” the seasoning into the meat. Leave the meat in fridge to marinate for at least 4 hours.

Heat oil in frying pan. Saute chicken pieces over medium heat to cook thoroughly. For crispy skin, after chicken pieces had been cooked, pan fry the chicken over high heat for browning.

(B) Sauteed Potatoes
– Mini Potatoes, washed skin
– Black Pepper
– Salt
– Lawry’s Steak Seasoning

Buy those mini potatoes with washed skin, so it’s easier to cook.

Boil a pot of water, with added salt (you can be generous here). Half the potatoes and boil them in the water, for about 15 to 20 minutes.

Dish up the boiled potatoes. Heat oil in pan, add potatoes, salt and black pepper. You can also add some steak seasoning here for added taste (optional). Stir fry potatoes till skin looks crispy.

(C) Almond Longan Jelly
– Almond Jelly Powder
– Canned Longan in Syrup
– 1 can of 7-up

Prepare jelly as in directions. After jelly is ready, cube it. Drain out the longan syrup. Add in equal portion of 7-up to syrup. Add in almond jelly.

My colleague taught me this recipe, after tasting the jelly during our BBQ. I like the 7-up in the syrup, cos it taste much more refreshing! Maybe next time I can try to add in Moscato d’Asti instead. Teeheehee!

Pre-Valentine’s Day Celebration

Had dinner with The Pau yesterday for an early Valentine’s Day celebration!

I happily paired the top and skirt together, and then suddenly I wonder if this makes me some kind of fashion orbiang. LOL.

Supposed to go for 1 of my friend’s housewarming, but my iPhone decided to totally black out. So had to fix the phone and rushed over to church. Felt so bad to miss my friend’s housewarming : (

After church, we had dinner at SALTA, Icon Village. Seems like a restaurant between casual and fine dining. Service wasn’t very prompt and the wait staff didn’t made me feel very welcomed. Luckily the manager was very warm!

My Valentine’s Day present: fragrance by Chloe! : )

We ordered the SALTA toast, mixed sausage platter, sirloin steak and house red (Malbec).

I probably wouldn’t think that the food (tastiness) is worth the money spent. Yes, they are quite unique. But probably it would be my first and only time there.

Wine is quite limited, mostly from Argentina only.

The only plus point about that night is the wine and The Pau, with super nice ambience.

If you ask me, I wouldn’t go back again.

x x x x x x x x x

We decided to cook our own dinner for The Pau’s family on Sun.

Had spaghetti, sicilian chicken (cook cheat: ready made from Cold Storage lol), breaded dory fillet and scallop.

I hadn’t cooked spaghetti for 6 pax before, and I really think we are lucky as the pasta turned out really nice ;p

Our spaghetti sauce was from Preggo. Firstly we fried the minced garlic, then add in diced bell peppers. Fry for a couple of minutes. Add in the pasta sauce, throw in sliced button mushrooms and abalone clams. Lastly, add in a few tablespoons of the abalone clam stock to enhance the taste.

I “breaded” the fish (I really know how my email address come about hahaha) and scallops myself. We usually dip in egg and bread crumbs twice. Then handed them over to The Pau Chef for deep frying.

And yes, I can cook one! ;p

Advance Birthday Celebration for Mr Pau

Mr Pau’s birthday is this week! : )

But I guess I can’t celebrate with him on the actual day cos it’s a weekday. So we celebrated in advance last weekend!

I decided to cook and make an easy-to-make cheater’s cake (lol). Every item prepared is supposed to be Mr Pau’s favourite.

If friends would know me since my poly days, I can do desserts well, but cooking fail that kind. Hahaha!!

So it was quite a challenge for me. Esp I am handling prawns. I total fail at handling/cooking for anything that includes shell ;p

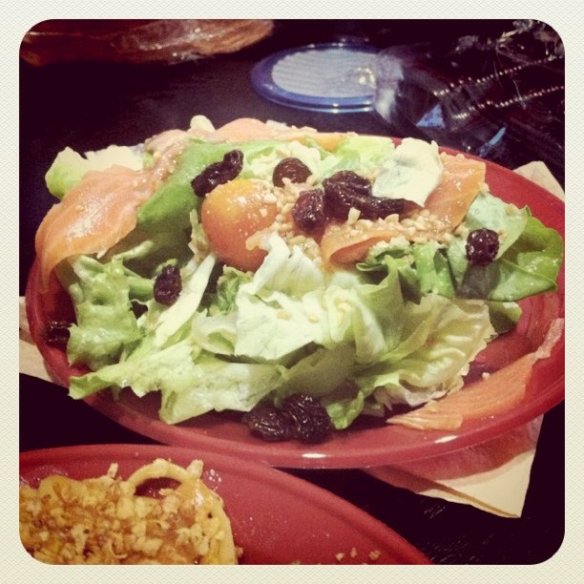
First up! Smoked salmon salad : )

I totally love cheater’s way of ‘cooking’ because people believe you can cook, when you use a lot of ‘ready made’ stuff. Hehe!

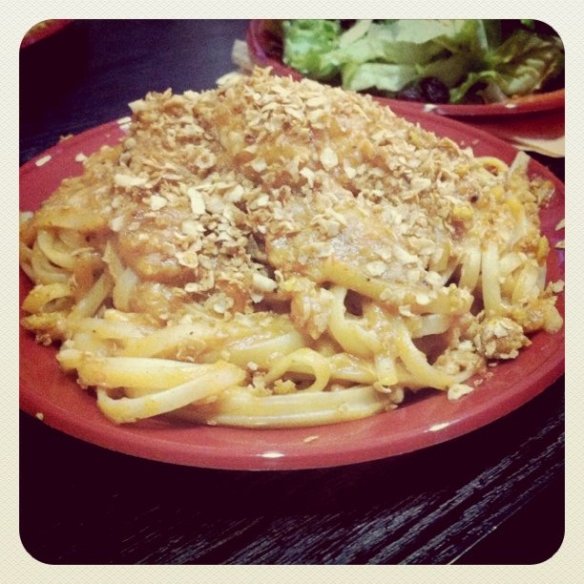
I decided, somehow, that I’d cook chilli crab pasta. Decided to ‘modify’ a bit by sprinkling a little of the cereal mix from the cereal prawns. Yum!! : )

Just that I realised I cannot multi-task, cos I was cooking the gravy together with the pasta. And somehow I just let the pasta overcook. Hahaha!

I think the gravy taste better with ‘jiam tao roti‘ or rice.

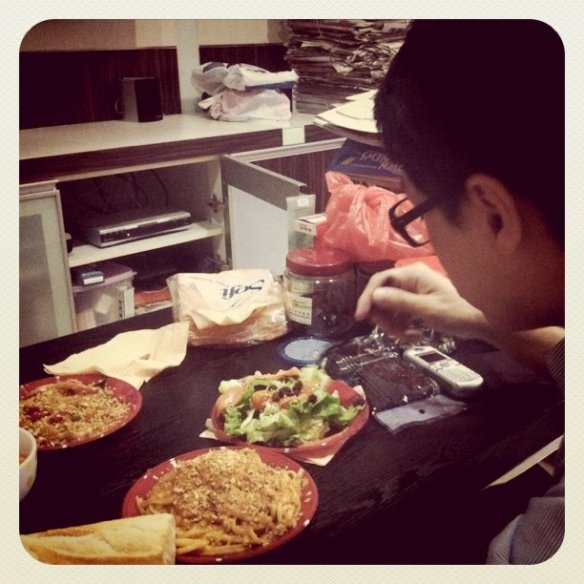
My happy Pau eating : )

And here comes the HIGHLIGHT of the day!

*JIANG JIANG!!* Durian Tiramisu.

LOL.

I jokingly told Mr Pau that he’d know how much I love him by the dessert I made.

Friends would prolly know I don’t eat durian, let alone so much durian combined together.

OMG, the pungent smelly fragrant smell of the fruit. Haha!

I forced Mr Pau to take this pic. Haha!

The dessert is super easy to make. I guess the taste cannot be compared to famous bakery or cafes, but given the ingredients vs taste vs cost, I think it’s very well justified!

I took the recipe here from Cuisine Paradise, and sort of combined the recipe with Noobcook’s tiramisu recipe (that I made earlier).

Ingredients:
1 Packet of Sponge Fingers (24 savoiardi)
250g Mascarpone
300ml Whipping Cream
300g Fresh Durian Flesh
200ml Chocolate Milk
Dutch Cocoa, for dusting

I didn’t get whipping cream cos I wanted a creamier texture, so I used thicken cream.

Getting the durian is another thing. Since I don’t eat durians, I really duno how to choose. Thanks to the promoter at NTUC Xtra, everyone loved the durian (incl my father!).

I didn’t have a scale, so I didn’t weigh the durians. I go by agar-ration ;p I guess you can add more durians if you love the texture of durian pulp.

Method:
1. Pour chocolate milk into a shallow dish. Set aside.
2. Beat the durian paste and whipping cream in a large bowl with electric beaters for about 15 seconds till thick and creamy.
3. Add in mascarpone and give it a quick whisk until just combined.
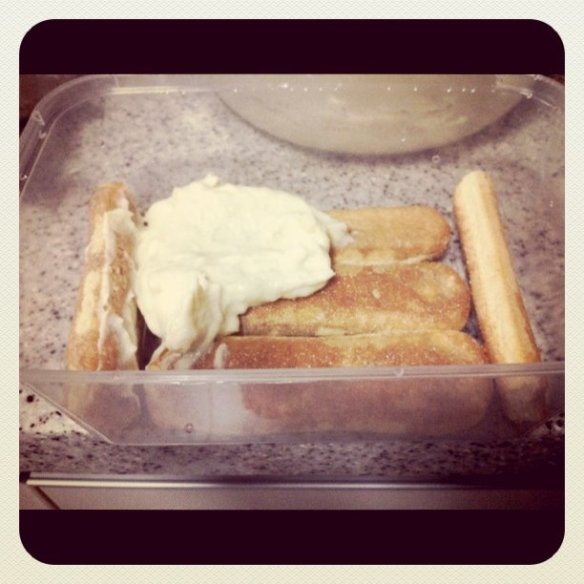
4. Dip Sponge Fingers biscuits, 1 at a time into the chocolate milk then arrange in a single layer over the base of the container. (do not dip the sponge fingers for too long or else it will be too soggy and spoilt the taste of the tiramisu)
5.Cover the biscuits with a layer of the mascarpone mixture and repeat another layer on top, ending with the cream.
6. Cover with plastic wrap and refrigerate for at least 2 hours. Dust generously with cocoa and serve.

I somehow cannot imagine I handled so MUCH durian hahaha!

I didn’t have electric beaters so I just whisk the thicken cream (I used 2 tbsp) with the durian flesh. Don’t whisk too much if you’d like to have the creamy durian pulp texture in the tiramisu.

Next add in the mascarpone cheese, and whisk to well combined. It’ll give a slightly lighter cream color mixture. And you’re done!

Pour the choc milk onto a shallow dish. Dip the sponge fingers into the choc milk, both sides and set it into the container. Layer the cheese mixture on top. Repeat : )

Note to not SOAK the sponge fingers. Cos my first tiramisu experience made me see the sponge fingers disintegrate in the coffee mixture cos I SOAKED it. LOL.

I’m glad I tried to cook and bake. Cos somehow I think it’s cheaper to cook yourself!

Costs:
1. Salad – Garden Salad S$2.75 (comes with nuts, raisin and dressing) + Smoked Salmon S$7.90 = S$10.65

2. Chilli crab pasta – Prawns S$2.40 + Frozen Crab Meat S$3.50 + Premix S$6.70 + Pasta S$2.25 = S$14.85

3. Cereal Prawns – Prawns S$2.80 + Premix S$1.99 + Chilli S$1.20 + Curry Leaf S$0.65 = S$6.64

4. Durian Tiramisu – Durian S$14 + Mascarpone Cheese S$7.00 + Sponge Fingers S$3.50 + Thicken Cream S$3.90 = S$28.40

Total = S$60.54

: )

Mango Mochi

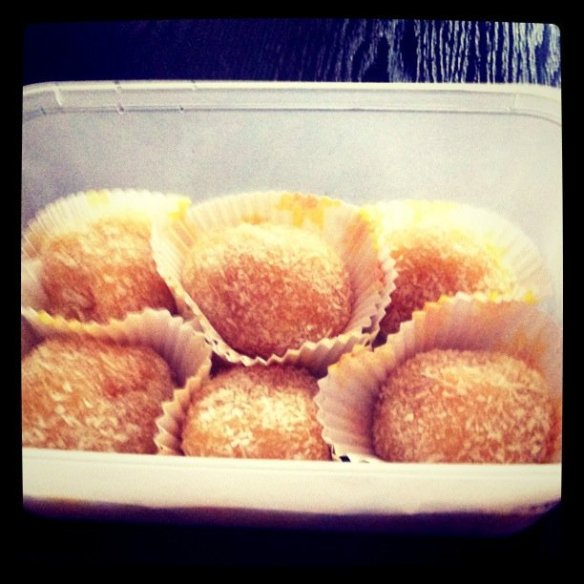
Made some mango mochi for Mr Pau yesterday!

(Yes, I know what you’re thinking about. I CAN COOK! Hahaha)

I used to bake when I was younger – kueh bangkit, cheesecake, cookies etc – and I enjoy the baking process!

Hurhur.

Anyway, I saw many recipes on the mango mochi. But I decided to choose the simpler version, just in case I cannot manage ;p

I used this recipe from More Than Words, and modified a little. Hee.

Ingredients:
– 1 cup glutinous rice flour
– 180ml mango juice
– 1/4 cup sugar
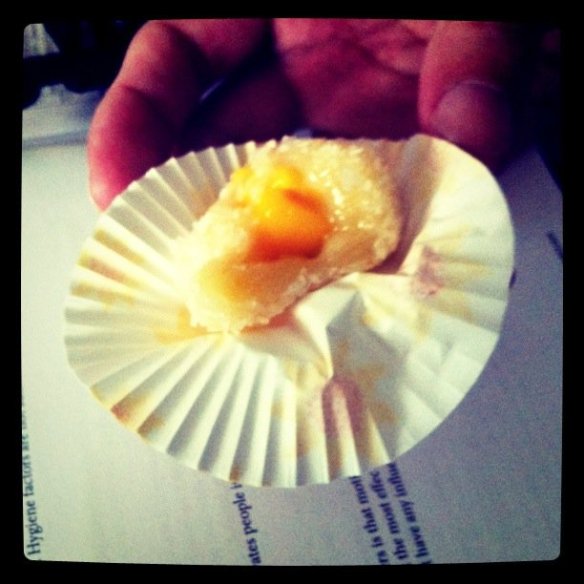
– 1/2 mango in tiny cubes
– shredded coconut for dusting/coating

Method:
1. In a glass bowl, combine flour,juice and sugar. Stir to mix well. (You can sieve the flour before combining. If not, do make sure the mixture is not lumpy before proceeding to next step)

2. Cover with a plastic wrap and microwave for 2 minutes. Remove and stir well. Return to microwave for another 30 seconds. Stir-well and check for doneness. If not, put it back for another 30 seconds, be careful not to burn it. In most cases, the first 30 seconds after the initial 2 mins should be enough. (The dough should look shiny and sticky)

3. Flour the working surface with coconut and use a spoon to drop a ball of mochi on top and quickly cover it with coconut. Wrap the mango inside and cover with more coconut. Shape into balls. Moisten if necessary to close the edges. Pop in your mouth and enjoy! (For me, I wore the plastic gloves and spread a little oil on it and roll the mochi balls. Then drop onto the coconut and roll it to cover the mochi)

Other than the ingredients above, I also added in mango flavour for the mochi skin, and drizzled some mango juice over the diced mango, so there’s more moisture. Not sure if it’s good or not ;p

If you’re new to baking/cooking and wanna try this out, do remember to roll the mochi balls after wearing those plastic gloves (those hawkers use when they handle food). I tried a few on my bare hands and the mochi turned into a sticky monster.

LOL.

Oh, and take note not to burn your fingers, cos the mochi can be quite hot after microwave.

Maybe next weekend Imma gonna try out Choc Mochi or Mochi Ice Cream! Hee!